
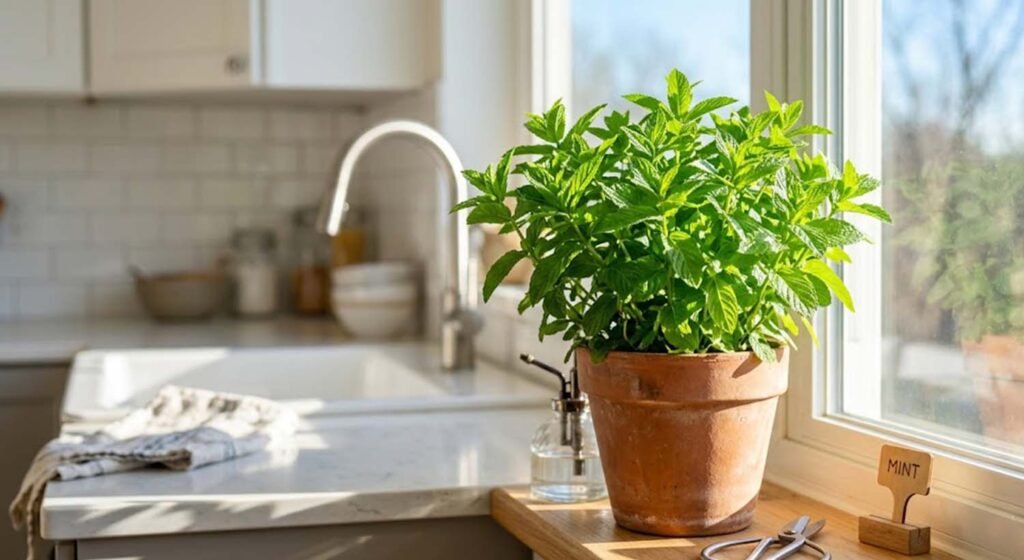
Introduction: Why Indoor Mint Dies (And How to Fix It)
Mint is famous for being an "unkillable" weed outdoors, but the moment people bring it inside, it often gets leggy, drops leaves, or rots. Why? Because indoor environments lack three things nature provides for free: blazing sunlight, perfect drainage, and fresh moving air.
Don't worry. Whether you want a kitchen counter herb station or a small indoor vertical shelf, this guide will show you the exact, foolproof way to grow lush, aromatic mint all year round.
Step 1: The Soil and Pot – Give Roots Room to Breathe
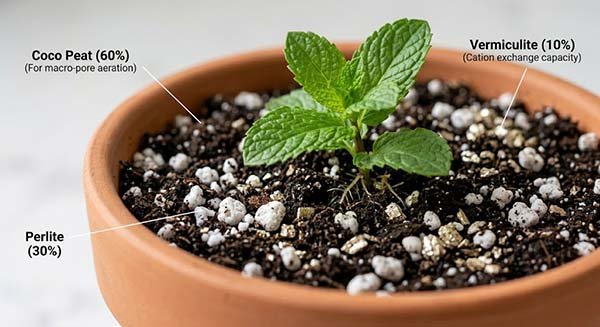
Easy Soil Mix: Peat/Coco 60% + Perlite 30% + Vermiculite 10% ==> Breathable, zero rppt-rot!
Mint spreads through underground "runners" (stolons). If your soil is heavy and tightly packed like backyard mud, water will trap inside, suffocating the roots and causing root rot.
- The Golden Soil Recipe: Never use regular garden dirt. Mix 60% peat moss or coco coir (to hold just enough moisture), 30% coarse perlite (those white, popcorn-like stones that create air pockets), and 10% vermiculite (to hold nutrients).
- Pick a Wide, Shallow Pot: Mint roots grow sideways rather than deep. Pick a pot that is wide and shallow (like a trough or a wide bowl). Make sure it has at least three large drainage holes at the bottom. Fabric pots or terracotta (clay) pots are the best because they let moisture evaporate from the sides.
Step 2: Light – The Engine for That Strong Minty Aroma
This is the number one reason indoor mint fails. Mint loves light. That strong, refreshing minty smell comes from essential oils in the leaves, and the plant needs heavy light energy to make them.
【Light Requirement Cheat Sheet】
Window: ☀️☀️☀️ (Often weak in winter)
LED Grow Light: 💡💡💡💡💡 (Best for dense, thick leaves )
- The Window Dilemma: A south-facing windowsill is a good start, but window glass filters out a lot of the usable light spectrum. In winter, natural light drops significantly, causing your mint to grow "leggy" - tall, skinny, pale, and completely flavorless.
- The LED Upgrade: If you want thick, dense leaves with zero legginess, use a dedicated LED grow light. Position our LED grow light tube or small wuantum board grow light about 30 - 45cm right above the plants. Keep it on for 16 hours a day. The high blue-light spectrum in the grow light stops the plant from stretching, forcing it to grow short, bushy, and packed with flavor.
Step 3: Water and Air – The "Dry-Back" Trick
Most people kill mint by watering it a little bit every single day. This keeps the soil constantly soggy and kills the roots.
- The 35% Weight Rule: Wait until the pot feels noticeably light when you lift it (about 35% lighter than when fully watered), or when the top inch of soil feels completely dry. Then, water it deeply until water runs out of the bottom holes. This sucks fresh oxygen down into the soil like a piston, giving the roots a fresh breath of air.
- Get the Air Moving: Static, stagnant indoor air causes humidity to trap around the leaves, leading to leaf rot and disease. Put a small house fan nearby on low speed to blow a gentle breeze (0.3 - 0.5m/s) across the plant. This keeps the leaves dry and healthy, and actually coaxes the plant into growing stronger stems.
Step 4: Pruning – How to Make One Stem Split Into Two
If you want a bushy plant, you must cut it. Never just pluck off individual leaves from the sides - that leaves a bald, weak stem.
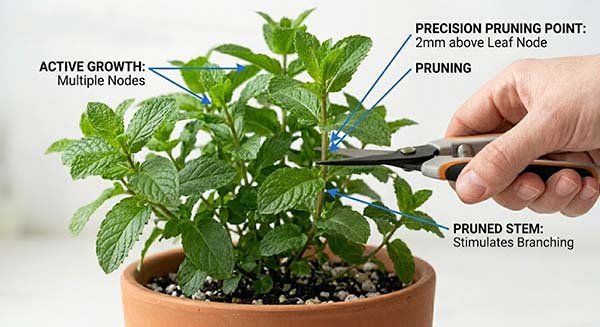
- The 2mm Node Rule: Look for a place where two leaves are branching out from the main stem (this is called a node). Use a clean pair of scissors to snip the stem 2mm right above those leaves.
- The Magic Results: By cutting off the top, you stop the stem from growing straight up. The plant will immediately redirect its energy to the two leaves below, and those two leaves will grow into two brand-new, full branches! Do this regularly, and your single plant will double in volume every few weeks.
Conclusion: Your Indoor Mint Success Starts Today
Growing mint indoors doesn't require a green thumb; it just requires a basic understanding of what the plant needs. By mixing a super-breathable soil, giving it plenty of light (whether from a sunny window or a high-performance LED grow light), and mastering the 2mm pruning trick, you will have an endless supply of fresh, aromatic mint right in your home.
The Quick Checklist:
✔ Shallow & Wide Pot
✔ 16 Hours LED Light
✔ "Dry-Back" Watering
✔ Snip Above the Node
Ready to Scale Up Your Indoor Growing?
If you are planning a larger indoor herb shelf, a vertical kitchen garden project, or looking for premium, commercial-grade lighting fixtures that keep plants short and bushy without wasting energy, we are here to help. Explore our range of led grow lights - engineered for perfect spectral uniformity and active heat dissipation. Let's make your indoor growing project a thriving success!
FAQ
Q1: My mint leaves are turning yellow at the bottom and falling off. What am I doing wrong?
- A: This is almost always a classic sign of overwatering or poor airflow. When the lower soil stays constantly wet, the roots choke and cannot transport nutrients upward. The plant sacrificed its oldest, bottom leaves first. To fix it, immediately stop watering, let the pot dry out completely until it feels light, and move it to a spot with better air movement. If the stems feel mushy, you may need to repot it into a fresh mix with more perlite.
Q2: There is a white, powdery film coating my mint leaves. Is it safe to eat, and how do I treat it?
- A: No, do not eat leaves covered in this film. This is Powdery Mildew, a very common fungal disease that thrives in warm, humid indoor spaces with stagnant air. To cure it safely at home without chemical pesticides, mix 1 tablespoon of baking soda and a half teaspoon of liquid dish soap into 1 gallon of water. Spray this mixture thoroughly on the affected leaves. Most importantly, prune away the heavily infected parts and turn on a small fan to keep the air moving!
Q3: My mint is starting to grow tiny purple/white flowers at the top. Should I let them bloom?
- A: Absolutely not! Snip them off immediately. Mint is grown for its foliage, not its flowers. The moment the plant enters the flowering phase, it redirects all its energy, sugars, and nutrients into making seeds. As a result, the leaves will stop growing, become tough, and lose that fresh, cooling menthol flavor, turning bitter. Keep cutting the flower buds off to trick the plant into staying in its vegetative growth stage. If you just have it for ornamental, you can let it go.
Q4: I bought fresh mint from the grocery store and rooted them in water. When and how should I move them to soil?
- A: Move them when the water-grown roots are about 2 to 5 cm (1 to 2 inches) long and start branching. Don't wait too long, as "water roots" are brittle and struggle to adapt to soil if they get too big. When transplanting, fill your pot with our fluffy coco-perlite mix, make a deep hole, and gently place the roots inside. For the first week, keep the soil significantly wetter than usual because the roots are used to pure water. Gradually reduce watering over 10 days to transition them to the standard "dry-back" routine.
Q5: Can I grow different varieties of mint (like Peppermint, Spearmint, and Chocolate Mint) in the exact same pot?
- A: You can, but it is highly discouraged for the long term. Mint varieties are incredibly aggressive underground. If planted together, the stronger, faster-growing variety (usually Spearmint) will quickly crowd out, suffocate, and kill the weaker variety. Furthermore, over time, if their underground stolons cross and tangle too tightly, their distinct chemical profiles can blend, causing your Chocolate Mint to lose its unique dessert-like aroma. It is always best to give each variety its own dedicated home.
Q6: Will mint grow in shade?
- A: Yes, mint can grow in partial shade, but it will not thrive in full shade or deep darkness. While mint is shade-tolerant, a lack of light causes the plant to become leggy and less flavorful. For optimal indoor growth in shaded areas, providing 4–6 hours of partial sunlight or using a specialized full-spectrum LED grow light for 12–14 hours is ideal to maintain healthy, bushy leaves.